How To Install a CPU
Before opening the case, unplug the PC to avoid an electrical shock hazard. Exercise caution as there are sharp edges on a PC and its components. Always wear a static electricity discharge strap and attach the lead to the metal frame of the case, when working with your PC's components to avoid damaging your PC. Note that some manufacturers will void your PC's warranty if you open the case.
Caution: Please read our safety information before attempting any testing or repairs.
-
Unplug the PC.
-
Locate the current CPU, socket or slot. If the CPU is positioned under other components, making access impossible, it will be necessary to extract the motherboard, remove the interfering components or further open the case.
-
Remove any fan or heat sinks that are not permanently attached to the CPU.
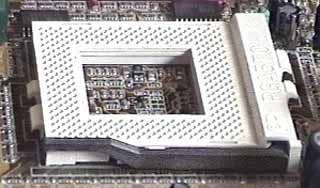
If the CPU is installed in a slot (single edge contact SEC), skip to step 9. Otherwise, locate the locking arm at the edge of the socket and lift it all the way up. The arm has a small catch in the locked position and so slip it out from under the catch. Gently lift the CPU straight up from the socket; it should require no force.

-
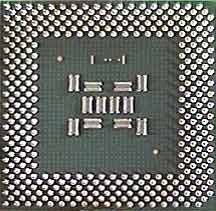
Examine the pin pattern on the new CPU and examine the socket. The CPU will have a notched corner(s), corner(s) without a pin or some identifying mark to align with the socket. The pins on the CPU are very delicate and if broken off, cannot be repaired so be very careful with the pins. Set the CPU in place. There is only one correct alignment for the CPU and it should drop into place in the socket with no force.

-
With the CPU fully inserted, there should be no space between the socket and the CPU. Once you have confirmed this, gently move the lever arm down and latch it into the closed position. It will have a very small amount of resistance. No force should be required, just gentle pressure.
-
Install the heat sink or CPU fan and plug it in. Now, skip to step 12.
-
If installed in a slot, locate and unfasten any latch or other securing mechanism. Firmly slide the CPU card straight up from the slot. A small amount of end-to-end rocking motion may aid in extracting the card.
-
Align the CPU card with the slot; there is only one orientation for it to fit. Slide the card down into the slot with firm pressure. It may require some end-to-end rocking motion to get it in. The latches should lock in place automatically. Make sure it is all the way in.
-
Install any heat sink, fan and vent shrouds designed to work with the CPU to aid in cooling. Plug in the fan(s).
-
While some motherboards will automatically self-configure for the voltage and clock speed, others require you to manually set jumpers or adjust the settings in the BIOS. You will have to refer to the manual supplied with your motherboard for these settings. Some boards have the settings information printed onto the motherboard. If you cannot find the manual or the settings printed on the motherboard, check the web site of the manufacturer. Incorrect settings can result in damage to the CPU.
-
Close the case
-
Plug in the PC and start it.
-
Go into the BIOS, if necessary, to complete the settings for operation.


