


How To Replace a Slip-on Connector
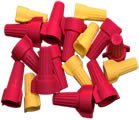
Many devices use slip-on electrical connectors, as shown below. These connectors eliminate the need to solder a connection each time a part is removed or replaced. However, these connectors sometimes break off or become corroded and require replacement.
Caution: Please read our safety information before attempting any testing or repairs.
 Caution: Always unplug or disconnect the power before working on electrical devices.
There are two basic types of slip-on connectors, those that must be soldered to the wire and those which can be crimped onto the wire.

The crimp-on connectors are faster and easier to install. They are a perfectly good alternative to soldered connectors although they are slightly more likely to come loose or make poor contact with the wire.
Soldered connectors have the best contact and rarely come loose. Soldering contacts requires the use of a soldering iron and take more time to install.
How To Install a Crimp-on Connector
To install a crimp-on connector, strip the wire coating off of the wire to expose about 1/4 inch of wire (if you are using a large connector, more than a 1/4 inch may be needed). If the wire is stranded, twist it to ensure that no stray strands protrude. Unstranded wire (solid core wire) should be soldered because crimping usually cannot assure a tight enough grip on the wire.
If the connector has a plastic cover, slip it onto the wire first. Next, insert the wire into the opening on the connector. With a pair of needle-nose pliers crimp one side of the metal housing, then crimp down the other side. Crimping both sides at the same time will probably result in a poor grip and allow the wire to come loose.
page 1 of 2
