How to Test the Burner Heating ElementThe stove's burner heating element is a coil of metal sheathed in an insulator. Electrical current travels through the element. Resistance to the passing of electrical current causes the element to heat up. A precise temperature cannot be set for a burner, instead it is turned on and off repeatedly by the control to the achieve an average temperature. When it is set to a low temperature, the element is cycled on and off more frequently. For high temperatures, the heating element is energized longer with fewer on and off cycles. Some burners have two elements, with the second only being used only for high heat settings. Caution: Please read our safety information before attempting any testing or repairs.
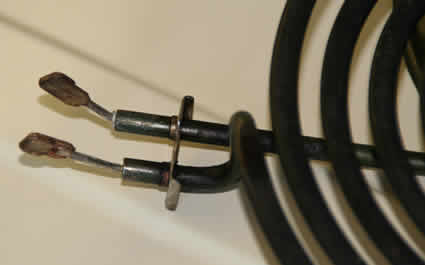
When a burner does not heat at all, or only heats up to a lower than expected temperature, the problem is likely to be with the heating element, the temperature control switch, or the wiring. If it only heats at the highest temperature, the problem is with the control or an electrical short, not the burner. If the burner works only intermittently, the problem is likely in the wiring or connectors. To test the heating element, try the following steps. First, disconnect the heating element from the stovetop. In most cases, this is done by lifting up the burner on the side opposite of the terminals (the part of the burner that disappears under the stovetop). Remove the decorative ring. Inspect the style of connection. If the burner element has visible blades that fit into the receptacle block, pinch the block with one hand, and pull the heating element free with your other hand. If the terminal block clamps over the element, the housing must be removed and the burner wires disconnected. Unsnap the metal piece or remove the screw that secures the receptacle block and then disconnect the element.
Inspect the heating element. If you find bubbles, warping, or damage to the insulation sheath, the burner must be replaced. If the terminals are dirty or corroded, this can cause poor temperature control, intermittent problems or complete failure to heat. Clean the terminals with steel wool or very fine sand paper to restore good conductivity. Test the resistance of the heating element using a multitester. Set the multitester to the ohms setting X1 and touch one probe to each of the terminals. A normal reading is typically somewhere between 20 and 120 ohms. The exact reading differs by manufacturer and mode. If the meter reads infinite resistance or the other extreme of the scale, zero resistance, then the element is damaged and should be replaced. If the measured resistance differs significantly from the expected range, the element is probably bad, but if possible, determine from the manufacturer what the actual resistance should be. To test for a grounded or shorted element, touch one probe to the surface of the burner and the other probe to each terminal in turn. If you get continuity at any time, the heating element is defective and should be replaced. Click here to order replacement parts. |
 |
|


