


How To Replace a Slab Door
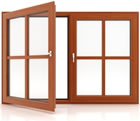
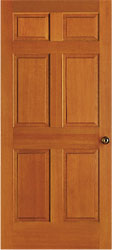
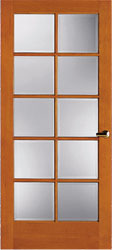
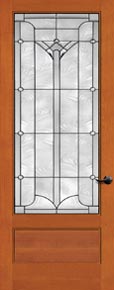
Update the look of your home by replacing old plain interior doors. There is a wide selection of decorative doors to improve the look of your home. Make your office feel more open with a glass door. Replace a plain pocket door with a raised panel door from yesteryear. Replacing an old door with a new door slab is fairly easy to do. A door slab is just the door, not the jamb. It can be fairly easy, but it will require some skill and the use of a wood chisel or a router. Alternatively, you can replace a door with a prehung door. A prehung door takes the precision work out of installing a door but requires more demolition and construction than just replacing a door slab. A prehung door will also cost more. To read more about hanging a prehung door see our article on Hanging a Prehung Door.
   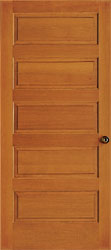 |
Photos courtesy of Simpson Door Copyright 2006 |
Pre-hung doors come from the factory ready to install in a rough opening. That means you don't have to worry about precision work to install hinges or the other challenges of "hanging a door". Pre-hung doors are hinged in a preassembled doorjamb that’s braced to keep the jambs and sill square while traveling. When purchasing a pre-hung door, you’ll need to measure the wall’s thickness so the new jamb will be flush with the existing wall surfaces. When ordering the door, you’ll be able to choose on which side it will be hinged, which way it swings, whether or not it will have factory-drilled holes for the lockset and, of course, height and width. You can choose a door that is smaller than your existing door, although you will have to verify with your local building department that a smaller door will conform with building code. You can also put in a larger door, but that becomes much more complicated because the opening will probably have to be reframed.
To begin installation, remove the old door and doorjamb. With an assistant to support the door, remove the bottom hinge pin, then the middle and finally the top pin. Pull the door away from the jamb and set it safely out of the way. Next remove the trim that covers the union of the wall and the door jamb. Next, remove the jamb. You can either pry it away from the studs, starting at the bottom, or if you have reciprocating saw fitted with a demolition blade, slip the blade between the jamb and the studs and cut all the nails securing the jamb. The rough opening should now exposed. Before putting the new door in place, verify that the new doorjamb is square, the hinges are flush, the lockset hole is properly drilled and all other features are correct. This is the time to adjust anything that’s not right. Make sure you have the hinges on the correct side and that the door will swing in the correct direction.
Next, rough fit the pre-hung door, with the squaring supports still intact, into the rough opening. Tilt it into the opening, with the bottom going in first and the top fitting in last. Once it is temporarily in the opening, remove the support straps. Center the door, making sure it can open and close freely.
To square the door, you’ll need to move from one side of the opening to the other. Squaring can be done by using tapered wood shims and pushing them into the space between the opening’s studs and the pre-hung jambs.
Start installing the door on the hinged side of the jamb, working first on the bottom section. As you mount the door, you’ll have to check the doorjamb, making sure it’s square. If needed, carefully tap shims in the bottom, hinged area. Using 10d-finishing nails, secure the lower part of the jamb by nailing through the jambs and shims and into the studs. Let the nails protrude an inch or two; do not finish them until you’ve nailed each side of the door in place. Once this step is finished check to see if the door is square.
Then work on the top hinged section, repeating the same process as above and next nail the area between the middle hinge and the top of the door. Finally, shim, measure and nail the place between the bottom of the door and the middle hinge. Then shim and adjust the other side of the doorjamb, nailing each section as you did the other side, except where you will have to cut for the door latch. Do not put nails in that area.
Take away any remaining support material that was shipped with the door and visually check to see if there’s about 1/16 th to 1/8 th of an inch between the jambs and the edges of the door. If the door looks uneven, remove the nails from the problem area and adjust with shims. Nail the area again and conduct another visual check. Once it’s correct, install the lockset.
Once the lockset is installed, finish anchoring the nails with a nail set. Then test to make sure the door opens and closes properly. With a handsaw, cut off any shims that are protruding. Finally, nail the trim into place with 6d-finishing nails.
This basic process may have to be adjusted, depending on circumstances. Throughout the installation, be sure to continually assess the status of the pre-hung door and adjust accordingly.
Caution: Please read our safety information before attempting any installation or repairs.
