How To Replace a PC Case
continued from page 1
- Disconnect the floppy drive, hard drive and CD-ROM ribbon connectors from the motherboard. To avoid confusion during reassembly, label the connector that was connected to the primary IDE controller. The primary IDE controller should be labeled on the motherboard and "PRI IDE", "IDE 1" or something similar.
- Remove the screws that secure each of the accessory cards to the case.If the motherboard has no obstructions blocking it, it may be possible to leave all of the cards in their slots and remove the entire motherboard intact. If so, skip to step 9. Otherwise, make a written note of which card is installed in which slot and remove the cards.
-
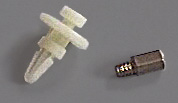
Remove the screws that secure the motherboard to the case. Instead of screws the motherboard may use plastic snaps. To release the snaps, pinch the plastic tip together while gently lifting the motherboard.
- Remove each of the drives, noting which cable is connected. If more than one device is connected to a cable, note the order of the drives.
- Inspect the new case and determine the best order for installing the components. In some situations, the drives may interfere with the installation of the motherboard or vice versa. Go to step 14 first if you installing the drives before the motherboard.
- Install the plastic or metal mounting posts into the case so they will align with the holes in the motherboard. Secure the board in place by snapping it in over the plastic posts or fastening it with screws.
- Connect the power supply to the motherboard.

page 2 of 3


