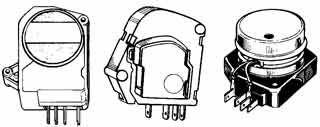
How to Test the Defrost TimerA mechanical defrost timer controls the defrost cycle of the appliance. In older models, the timer runs continuously and roughly every six hours, shuts off power to the cooling system and sends power to the defrost heater. In newer models the timer advances only when the compressor or defrost cycle is running - an improvement for efficiency. As the timer advances, power to the heating element shuts off and power is restored to the cooling system. If the timer does not advance, the appliance will be stuck either in defrost or refrigerate mode, resulting in, respectively, no cooling or frost Caution: Please read our safety information before attempting any testing or repairs.
The defrost timer is usually found behind the front grill of the freezer. It may also be found behind a cover plate inside the freezer, in the temperature control console, or behind the freezer near the compressor. To test whether the defrost timer is simply failing to advance, locate the advance screw and turn it clockwise until you hear it click. This advances it to the next mode. If it was cooling before, it is now in defrost mode. Simply wait about 35 minutes and check whether it has left defrost mode and has resumed cooling (listen for the compressor). If it does not advance, the timer motor is probably bad and the entire timer needs to be replaced. If it advances as it should, then you can follow the steps below to test the switch electrically. The timer is usually held in place with one or more screws. Remove the screws and gently pull the timer out far enough to disconnect the wiring connector. The connector can be removed by firmly pulling and rocking it left and right. It is not necessary to note the position of the wires because the connector plug is keyed so that it can be replaced in only one way.
Page 1 of 2 |
 |
|


